How to use GAD-7 on Counselling Network (Part 1)
Create a session and share it with a client
What is GAD-7 on Counselling Network?
GAD-7 is a simple 7-question anxiety check-in your client can complete on any device — usually in 1–2 minutes.
It’s built mobile-first, so it feels natural on a phone (big buttons, one question at a time), and it’s designed with accessibility in mind — it works well with screen readers and should still be usable even in text-only / reading browsers.
Instead of printing a PDF, scanning paper, or trying to keep track of notes between sessions, Counselling Network gives you a clean, modern way to do it:
-
Your client doesn’t need an account (it’s anonymous)
-
You create a session and share a code (or a one-tap link)
-
The client completes it in a few taps
-
Results are saved automatically so you can see progress over time
The best part is what happens afterwards: you get built-in charting and trends (line chart + radar) so you can quickly spot improvement, patterns, and changes week to week — without spreadsheets or manual admin.
It’s designed to be practical, lightweight, and genuinely useful in day-to-day counselling.
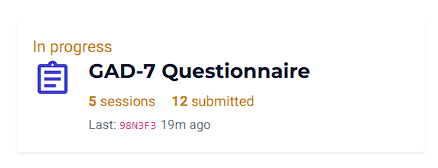
Step 1: Find GAD-7 in your dashboard
On your counsellor dashboard you’ll see the GAD-7 Questionnaire tile. This gives you an at-a-glance summary:
-
Number of active sessions
-
Number of submissions
-
The most recent code used and when the last submission happened
Click into GAD-7 Questionnaires to manage your sessions.
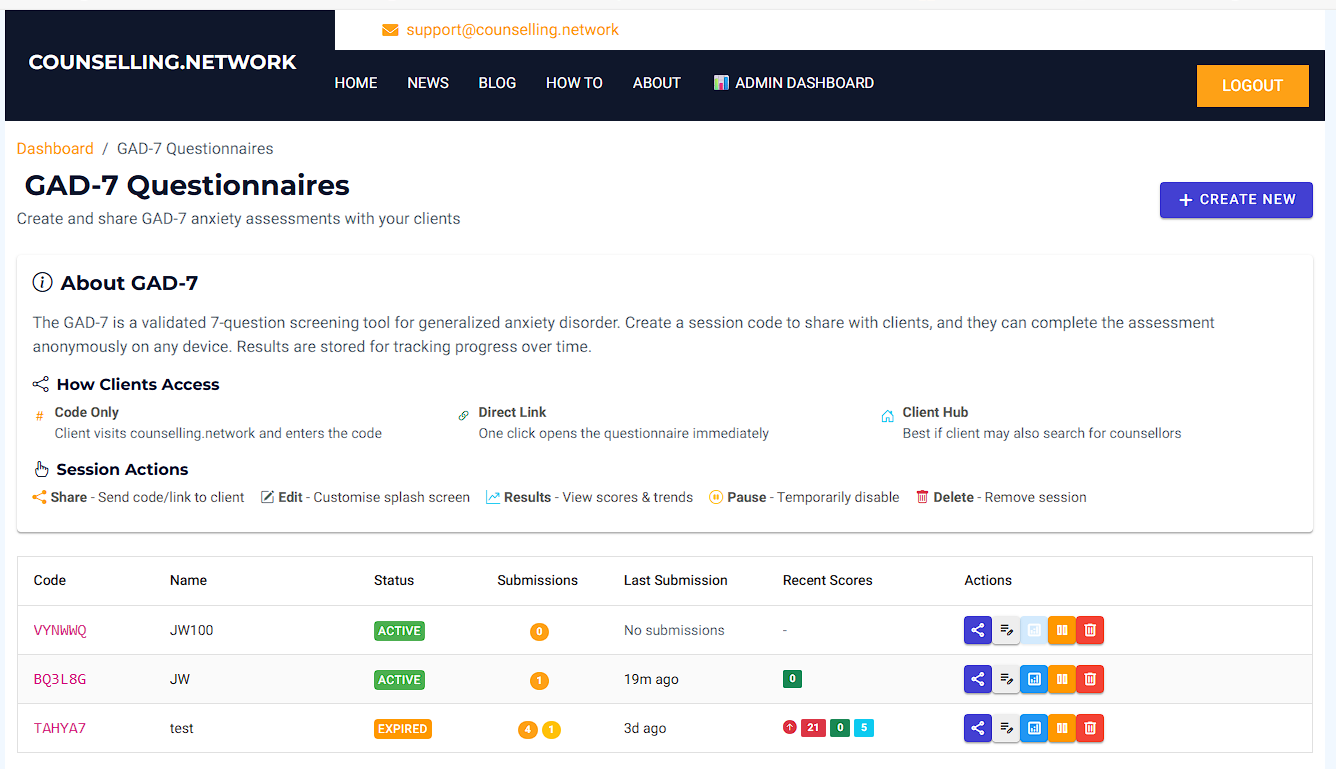
Step 2: Understand the sessions list
On the GAD-7 page you’ll see all your sessions listed. Each session is one code you can share.
You’ll see:
-
Code – the code the client uses
-
Name – your label for the session
Privacy tip: don’t use real names. Use labels like , , , etc. -
Status – Active or Expired
-
Submissions
-
Green = completed submissions
-
Yellow = started but not completed
-
-
Last submission – when it was last used
-
Recent scores – latest scores and a trend indicator
Step 3: Create a new session
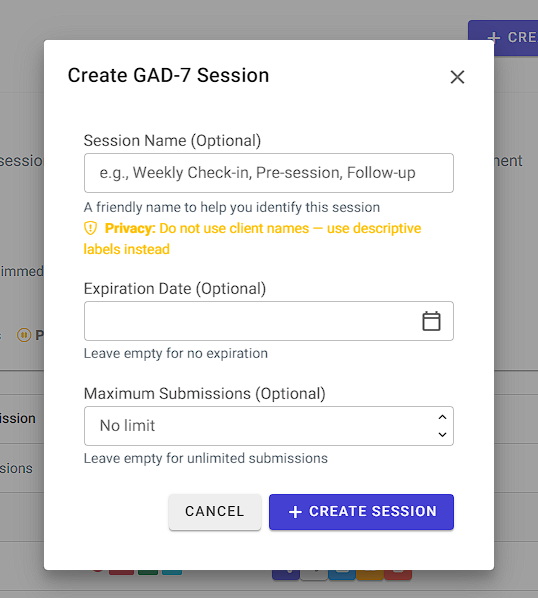
Click Create New.
In the Create Session box:
Session Name (optional)
Give the session a friendly label such as:
JW-Weekly, PreSession, Followup
Do not use real client names.
Expiration Date (optional)
Leave blank for no expiry.
Useful if you’re working in a time-limited block (e.g., 6 weeks).
Maximum Submissions (optional)
Leave blank for unlimited.
Useful if you want to cap how many times the code can be used.
Click Create Session.
After creating, you’ll see the session appear in the list as:
-
Active
-
0 submissions (until the client completes it)
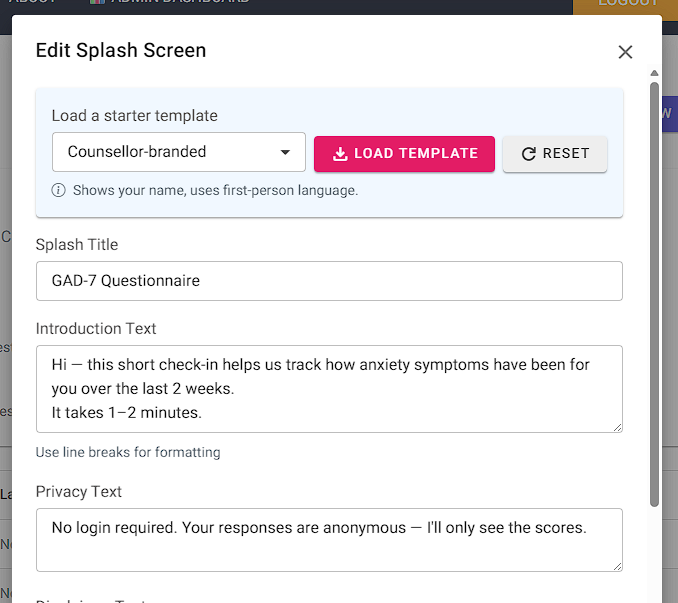
Step 4: Customise the client splash screen (recommended)
On your session row, click Edit.
You can either:
-
Load a starter template (fastest), or
-
Write your own text
Starter templates
Pick one and click Load Template:
-
Balanced (Recommended)
-
Extra reassuring
-
Super concise
-
Counsellor-branded
Selecting a template automatically updates the splash title, intro text, and privacy text. You can then edit anything you like.
Key fields you can customise
-
Splash Title
-
Introduction Text (you can use line breaks)
-
Privacy Text
-
Disclaimer Text
-
Button text (Start / Go to Counselling Network)
Emergency Contact Block
You can choose whether clients see a support panel before starting:
-
Toggle Show emergency contact information
-
Choose:
-
UK Default (999, NHS 111, Samaritans), or
-
Custom text
-
Show your name/branding
Enable:
-
Show my name/branding on the splash screen
So the client can see who invited them.
Preview and Save
Click Preview to see the client view at any time.
When you’re happy, click Save.
Tip: It’s worth creating a test session first so you can get comfortable with the feature.
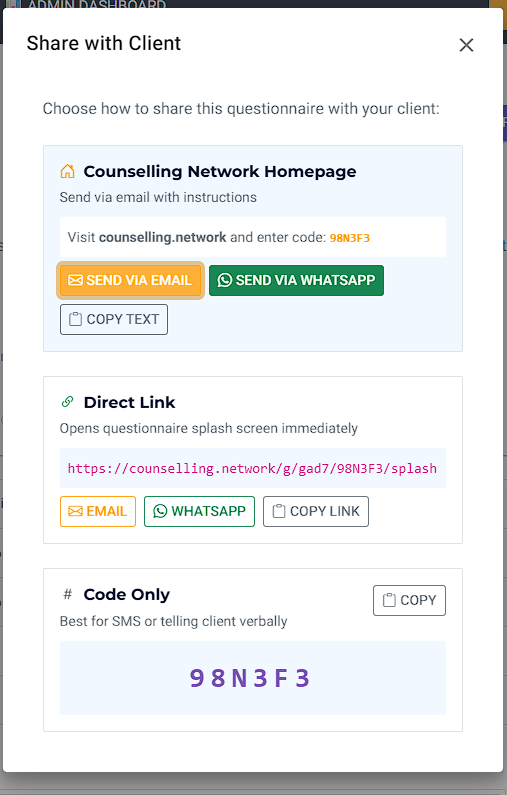
Step 5: Share with your client
On the session row, click the Share icon.
You’ll get three easy ways to share:
Option A: Counselling Network Homepage (Client Hub)
Sends instructions like:
“Visit counselling.network and enter code: ABC123”
Use:
-
Send via Email
-
Send via WhatsApp
-
Copy Text
This is a nice option if the client may also browse the site and blog posts.
Option B: Direct Link (fastest)
One click opens the questionnaire splash screen immediately.
Use:
-
Email
-
WhatsApp
-
Copy Link
Option C: Code Only (simplest)
Best for SMS or telling the client verbally.
Click Copy.
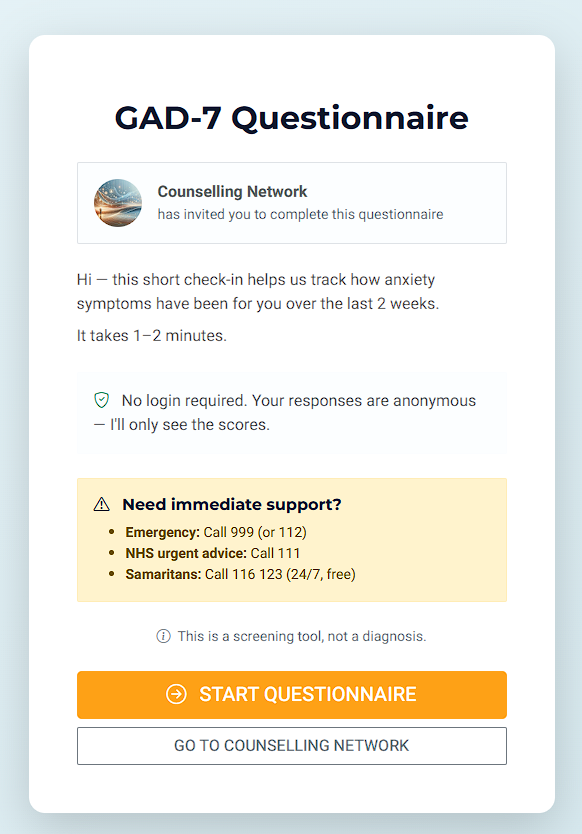
What your client sees
Clients see a calm splash screen with:
-
Your branding (if enabled)
-
Intro text and privacy note
-
Optional emergency/support panel
-
Disclaimer
-
A big Start Questionnaire button
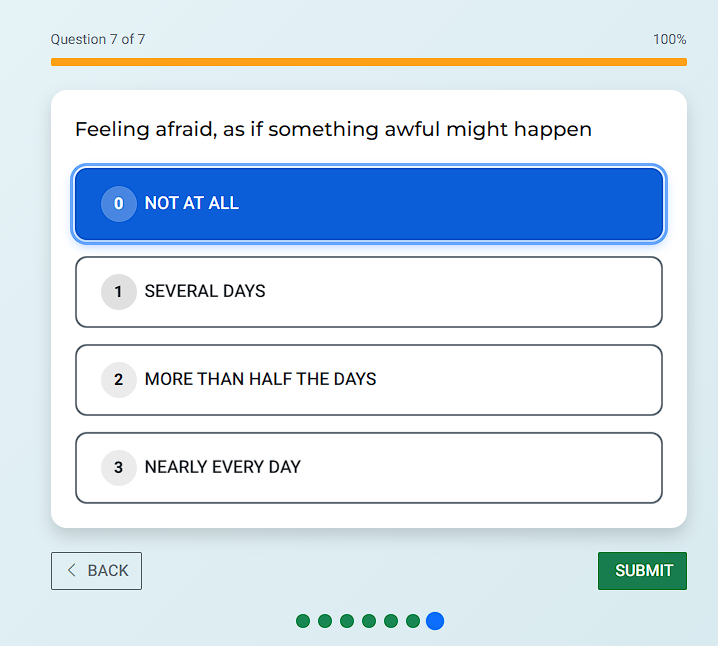
The questionnaire is mobile-first with big buttons and clear progress.
Important:
-
Clients cannot skip questions
-
If they leave part way through, it’s recorded as started but not completed
-
Once all 7 questions are answered, they can Submit
-
After submission they’ll see a confirmation page with their score and severity band